Programming Hotmoka
A tutorial on Hotmoka and smart contracts in Takamaka
Chapter 3 A first Takamaka program
Takamaka is the language that can be used to write smart contracts for Hotmoka nodes. Hotmoka nodes and Takamaka code have exactly the same relation as Ethereum nodes and Solidity code.
Let us start from a simple example of Takamaka code. Since we are writing Java code, there is nothing special to learn or install before starting writing programs in Takamaka. Just use your preferred integrated development environment (IDE) for Java. Or even do everything from command-line, if you prefer. Our examples below will be shown for the Eclipse IDE, using Java 21 or later, but you can perfectly well use the IntelliJ IDE instead.
Our goal will be to create a Java class that we will instantiate and use in blockchain. Namely, we will learn how to create an object of that class, that will be persisted in blockchain, and how we can later call the toString() method on that instance in blockchain.
3.1 Creation of the Eclipse project
(See the io-hotmoka-tutorial-examples-family project in https://github.com/Hotmoka/hotmoka)
Let us create a Maven project io-hotmoka-tutorial-examples-family inside Eclipse, in the hotmoka_tutorial directory. For that, in the Eclipse’s Maven wizard (New Maven project) specify the options Create a simple project (skip archetype selection) and deselect the Use default Workspace directory option, specifying a subdirectory
io-hotmoka-tutorial-examples-family of the hotmoka_tutorial directory as Location instead. Hence, Location should be something that ends with
…/hotmoka_tutorial/io-hotmoka-tutorial-examples-family. Do not add the project to any working set. Use io.hotmoka as Group Id and use the directory name
io-hotmoka-tutorial-examples-family as Artifact Id.
Maven project) specify the options Create a simple project (skip archetype selection) and deselect the Use default Workspace directory option, specifying a subdirectory
io-hotmoka-tutorial-examples-family of the hotmoka_tutorial directory as Location instead. Hence, Location should be something that ends with
…/hotmoka_tutorial/io-hotmoka-tutorial-examples-family. Do not add the project to any working set. Use io.hotmoka as Group Id and use the directory name
io-hotmoka-tutorial-examples-family as Artifact Id.
By clicking Finish in the Eclipse’s Maven wizard, you should see a new Maven project in the Eclipse’s explorer. Currently, Eclipse creates a default pom.xml file that uses Java 5 and has no dependencies. Replace hence the content of the pom.xml file that has been created in the io-hotmoka-tutorial-examples-family project with the following code:
<project xmlns="http://maven.apache.org/POM/4.0.0"
    xmlns:xsi="http://www.w3.org/2001/XMLSchema-instance"
    xsi:schemaLocation="http://maven.apache.org/POM/4.0.0 http://maven.apache.org/xsd/maven-4.0.0.xsd">


  <modelVersion>4.0.0</modelVersion>
  <groupId>io.hotmoka</groupId>
  <artifactId>io-hotmoka-tutorial-examples-family</artifactId>
  <version>|\hotmokaVersion{}|</version>


  <properties>
    <project.build.sourceEncoding>UTF-8</project.build.sourceEncoding>
    <maven.compiler.release>21</maven.compiler.release>
  </properties>


  <dependencies>
    <dependency>
      <groupId>io.hotmoka</groupId>
      <artifactId>io-takamaka-code</artifactId>
      <version>|\takamakaVersion{}|</version>
    </dependency>
  </dependencies>


  <build>
    <plugins>
      <plugin>
         <groupId>org.apache.maven.plugins</groupId>
         <artifactId>maven-compiler-plugin</artifactId>
         <version>3.11.0</version>
      </plugin>
    </plugins>
  </build>


</project>
It specifies to use Java 21 and provides the dependency to io-takamaka-code, that is, the run-time classes of the Takamaka smart contracts.
We are using 1.8.1 here, as version of the Takamaka runtime project. You can replace that, if needed, with the latest version of the project.
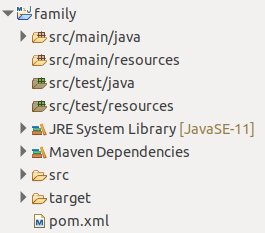
Since the pom.xml file has changed, Eclipse will normally show an error in the project. To solve it, you need to update the Maven dependencies of the project: right-click on the project then MavenUpdate Project. The imported dependency io-takamaka-code, that contains the Takamaka runtime, should be downloaded and everything should compile without errors. The result in Eclipse
should look similar to what is shown in Fig. 3.1.
Create a module-info.java file inside src/main/java (right-click on the project, then ConfigureCreate module-info.javaCreate), to state that this project depends on the module containing the runtime of Takamaka:
module family {
    requires io.takamaka.code;
}
Create a package io.hotmoka.tutorial.examples.family inside src/main/java. Inside that package, create a Java source Person.java, by copying and pasting the following code:
package io.hotmoka.tutorial.examples.family;


import io.takamaka.code.lang.StringSupport;


public class Person {
    private final String name;
    private final int day;
    private final int month;
    private final int year;
    public final Person parent1;
    public final Person parent2;


    public Person(String name, int day, int month, int year, Person parent1, Person parent2) {
        this.name = name;
        this.day = day;
        this.month = month;
        this.year = year;
        this.parent1 = parent1;
        this.parent2 = parent2;
    }


    public Person(String name, int day, int month, int year) {
        this(name, day, month, year, null, null);
    }


    @Override
    public String toString() {
        return StringSupport.concat(name, " (", day, "/", month, "/", year, ")");
    }
}
This is a plain old Java class and should not need any comment. The only observation is that we concat strings with the support class StringSupport, since the standard string concatenation of Java would end up calling methods whose computational cost is not foreseeable in advance. In general, a very small portion of the Java library can be used directly in Takamaka, and support classes are used to replace some common functionalities, such as string concatenation.
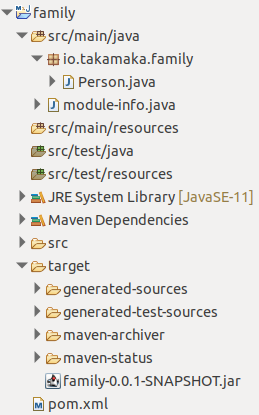
Package the project into a jar and install it in the local Maven repository, by running the Maven command mvn install inside the directory of the project (that is, inside the subdirectory hotmoka_tutorial/io-hotmoka-tutorial-examples-family). This should generate a file named io-hotmoka-tutorial-examples-family-1.12.3.jar, inside the target directory. Only the compiled class files will be relevant: Hotmoka nodes will ignore source files, manifest and any resources in the jar; the same compiled module-info.class is irrelevant for Hotmoka. All such files can be removed from the jar, to reduce the gas cost of their installation in the store of a node, but we do not care about this optimization here. The result should look as in Fig. 3.2.
The Group Id can be changed as you prefer, but we will stick to io.hotmoka to show the exact files that you will see in the provided code.